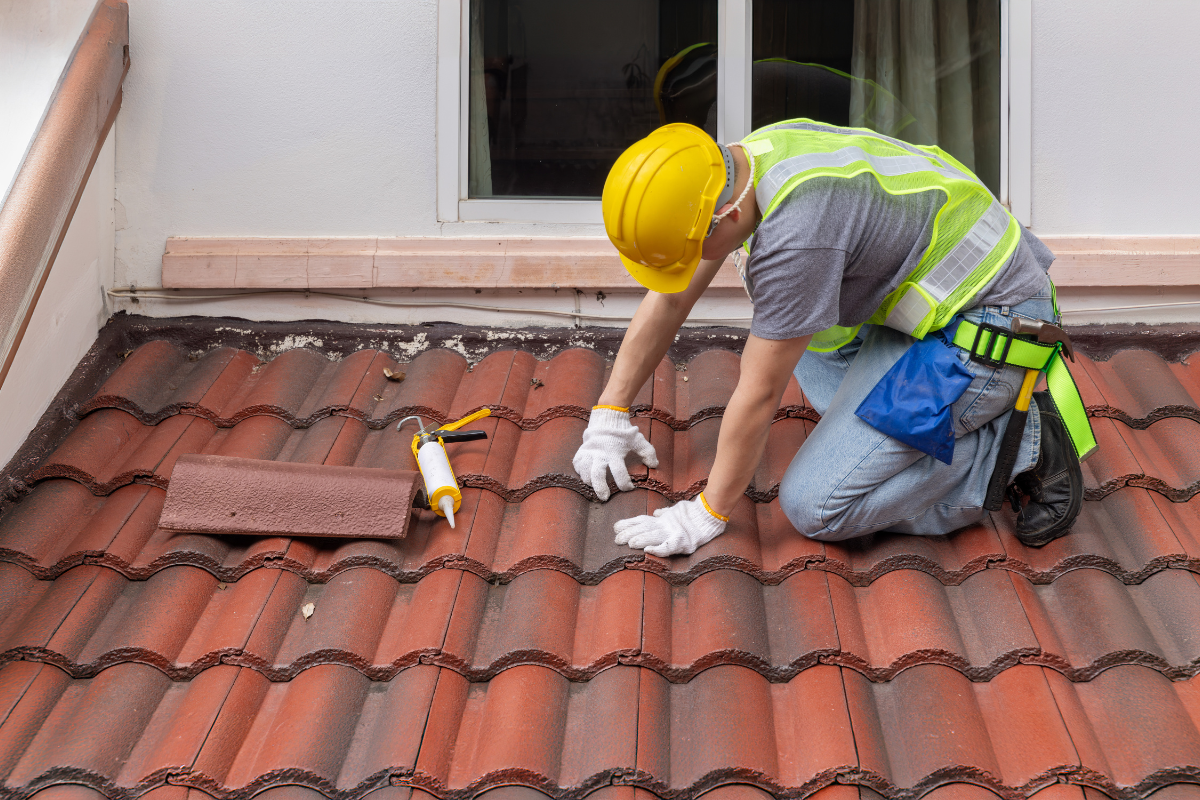
Most leaks that ruin drywall, rot fascia boards, and blister paint don’t start in the middle of a roof. They start at the edges. That thin strip of metal along the eaves and rakes, the drip edge, is the quiet workhorse that keeps water where it belongs. Installed well, it helps a shingle roof shed water cleanly, prevents capillary wicking into the deck, and blocks wind-driven rain from curling under the shingles. Installed poorly, it can channel water into the sheathing, invite ice back-ups, and https://manuelvpbf081.image-perth.org/a-step-by-step-roof-shingle-replacement-checklist cut years off the life of the roof.
I have replaced more rotten sub-fascia than I care to admit because a house either lacked a drip edge or had one buried the wrong way beneath underlayment. The repair bills almost always dwarf what proper metal and labor would have cost at roof shingle installation. If you want your shingle roofing system to last, this is the edge detail to get right.
What a Drip Edge Actually Does
A drip edge is an L- or T-shaped strip of corrosion-resistant metal that sits at the perimeter of the roof. It bridges three regions that never quite agree with each other: the roof deck, the underlayment, and the free air beyond the fascia. Its job is threefold.
First, it creates a break in surface tension. Water clings to surfaces. Without a sharp, extended lower lip, runoff curls underneath and runs back along the underside of the plywood or OSB. The proper profile projects far enough past the rake and eave to force a clean break so water falls into the gutter or away from the fascia.
Second, it protects the deck edge and fascia from wind-driven water. Shingle edges are vulnerable to uplift. In a storm, rain can blow uphill. The flange of the drip edge covers the edge grain of the wood, a sponge when exposed, and the vertical leg shields the fascia.
Third, it stiffens the perimeter. The metal strengthens the shingle edge, discourages sagging over time, and gives the starter course a firm, consistent bearing. On a hot day when asphalt softens, that rigid base matters.
In cold climates, add one more role. At eaves, the drip edge ties into ice and water barrier to reduce the chance of ice dams flowing back into the roof deck. It is not a cure-all, but it’s a critical piece of the defense.
Materials and Profiles: Not All Metal is Equal
I have seen homeowners try to save a few dollars with painted aluminum sold in bargain bins. Some of that metal is so thin you can crease it with thumb pressure. It might look fine on day one, but it warps, oil-cans, and lifts at the first thermal cycle. If you want a number, aim for 0.019 to 0.024 inch aluminum in most residential applications, heavier in coastal or high-wind zones. Galvanized steel at 26 or 24 gauge holds straighter, but it must be well coated, and cut edges should be primed. In coastal environments, aluminum or stainless makes more sense than plain steel, since salt eats galvanized coatings faster than anticipated.
Profiles matter. Traditional L-profile offers a small kick-out at the bottom. The D-profile, sometimes called T-style or “hemmed drip,” has a pronounced angled face and a hemmed edge that resists capillary action and gives a cleaner drip line. The hemmed edge also stiffens the part and is gentler on gutters. For shingle roofs near tall trees, I prefer a D-profile with a two-inch lower leg at the eaves, since it throws water past the outer lip of the gutter better when leaves partially clog the trough.
Color sounds cosmetic, but it can be practical. White reflects heat and pairs with white fascia. Dark bronze hides in shadow under darker shingles. If you plan to repaint fascia, choose a factory finish compatible with common exterior paints, or order raw mill for custom coating. The shingle roofing contractor you choose should show samples and explain fade resistance.
Where Drip Edge Belongs in the Assembly
Think of the roof edge as a layer cake. At the eaves, from the deck up, the proper sequence is deck, drip edge, self-adhered ice and water barrier, underlayment, and shingles. At rakes, it changes slightly: deck, underlayment, then drip edge, then shingles.
That difference is not arbitrary. At the eaves, you want the membrane over the metal to seal around nail penetrations. If wind drives rain upward or an ice dam occurs, water that gets under the shingles hits the membrane and drips onto the drip edge, not behind it. At the rakes, the underlayment belongs underneath the metal, so if the wind drives rain laterally under the shingle, it meets the metal and is kicked out, not under the felt.
Some contractors reverse these layers out of habit or to save time. The telltale is water staining on the top of the fascia a season or two later. If you are paying for a roof shingle replacement, ask your installer to describe the sequence. It is a simple proof of craft.
Edge Geometry: Overhangs, Setbacks, and Straight Lines
Shingle edges are unforgiving to wavy carpentry. Before any metal goes down, I sight along the eaves. If I see dips at rafter tails or a bowed fascia, I correct it with a taper shim at the edge of the deck or a new straight fascia board. Drip edge only performs well when it sits flat and straight.
Overhang matters. The horizontal flange under the shingles should extend beyond the sheathing by roughly half an inch. The lower L should project into or just above the gutter’s back edge. In most cases, I set the metal so the hem sits about a quarter inch off the vertical face of the fascia. This keeps the drip line clean and prevents water from wicking back. When gutters are present, I check the alignment so the water lands in the trough. If the gutter is mounted unusually high, a D-profile with a longer lower leg helps.
Shingle exposure at the edge pairs with this geometry. I run starter shingles with a 3/8 to 1/2 inch overhang past the drip edge at eaves, slightly less at rakes. More than that invites droop and wind tear; less risks water curling under. You want a crisp shadow line that looks deliberate.
Nails, Seams, and the Quiet Details
Fasteners are small, but they decide whether the metal stays put in a gale. I use roofing nails with wide heads, corrosion-resistant, long enough to penetrate through the deck. Nails go high on the vertical face and along the flange in the nail zone, not near the drip lip where swelling and oil canning occur. At least every 8 to 10 inches at minimum; in coastal or high-wind zones, tighten to 4 to 6 inches, with extra at corners.
Seams need overlap that matches wind exposure. Six inches is a good baseline. I lift the hem of the upper piece slightly and bed the overlap in a bead of high-quality sealant, then squeeze the pieces tight so capillary action cannot pull water backward at the seam. In colder regions, I prefer a factory hem that allows a slip-lock seam. The small added cost pays off when the roof expands and contracts through the seasons.
Avoid crimping the drip lip where it hangs over the fascia. A crimp creates a path for water to cling and run back, defeating the purpose of the edge.
How Drip Edge Protects the System Over Time
A roof looks good on day one almost regardless of detail. The real test shows up in year eight, twelve, or after the first hurricane or ice storm. Proper drip edge installation pays off in several ways:
- It keeps the deck edge dry, so your plywood does not delaminate and your OSB does not swell. Swollen edges telegraph through shingles as bumps. Those bumps lift shingle tabs and create pockets that collect water, a path to early roof shingle repair. It protects the fascia board and the top of the sub-fascia, where paint fails first. Once that wood rots, gutters lose their anchor, and your downspout alignment suffers. It prevents the under-shingle courses from wicking water. Capillary action can pull water several inches uphill under the right conditions. The hemmed drip line provides a discontinuity that stops that climb. It cuts down on wind uplift at the perimeter. A stiff, well-nailed edge reduces flutter. Fewer lifted tabs mean fewer shingles to chase in the yard after a storm. It reduces ice dam damage. A membrane over the eave drip edge seals the nail holes at the cold roof edge. When ice backs up under shingles, meltwater meets the membrane and drains onto the metal rather than into your living room.
I have returned to roofs where everything else was basic, but the drip edge was done right, and those homes avoided the litany of edge-related failures. The opposite is also true. Beautiful designer shingles installed without metal at the eaves almost guarantee a soffit repair in a few winters.
Integration with Gutters and Fascia Systems
On homes with K-style aluminum gutters, the back of the gutter often tucks behind the drip edge. This is ideal. It means water cannot sneak behind the gutter and stain the fascia. If a gutter hanger system already sits tight to the fascia, I notch the drip edge carefully to slide behind the hanger. A sloppy cut there becomes a leak path.
With half-round gutters mounted on external brackets, the drip edge must throw far enough that the arc catches the water. I sometimes choose a deeper profile or set the gutter a half inch lower. You want consistency from corner to corner, especially on long runs where a minor misalignment can trickle stain lines down the fascia for years.
Fascia with a metal wrap complicates things but not by much. The drip edge needs to lap over the fascia cap. If the cap already runs up onto the roof deck, pull it back and terminate behind the drip edge. Metal on top of metal, in the right order and with tight seams, is your friend.
Common Mistakes, Seen From the Ladder
Most problems I see trace back to habit or speed. The crew follows what they did last summer, or the mid-day sun is cooking, and they just want to move. Watching for these tells can save you money when you hire a shingle roofing contractor:
- Underlayment over drip edge at eaves. It seems tidy until the first ice dam. Membrane belongs over the eave metal, felt over the rake metal. Too little overlap at seams. Two inches is not enough. In wind-driven rain, water climbs. Give it six inches, ten if your ridge-to-eave run is long and exposed. Sparse nailing. If nails are 12 inches on center, the metal will chatter and lift. Add more at gables and around dormers. No kick at the bottom. A flat, unhemmed edge near the fascia invites water to curl back. Choose a hemmed profile or add a formed kick. Jagged cuts at corners. The edge should wrap cleanly around the rake to eave transition with a miter that sits flat. Gaps let water in and look sloppy from the yard.
A neat edge line from the ground is usually a clue to neat work up close. But not always. I have seen artful paint hide mistakes. If you are having a roof shingle replacement done, ask for photos of the eave and rake detailing before shingles go down. Good roofers are proud to show this phase.
Climate Considerations That Change the Details
Roofs do not all face the same weather, so drip edge choices vary.
In snow country, extend ice and water shield at least 24 inches inside the interior wall line. On lower slopes, go farther. Use a heavier-gauge D-profile with a hem. The larger face helps break ice sheets as they slide, so the edge does not tear. Nail it tight, but do not overdrive nails through a cold, brittle membrane.
In hurricane zones, code often dictates minimum metal thickness and specific nailing patterns. I follow local wind uplift tables and extend overlaps to at least six inches with sealant in the laps. The rake edge takes a beating in crosswinds. On steep rakes, I sometimes add a secondary cleat under the drip edge to increase pull-out resistance.
In arid, hot climates, thermal expansion is the enemy. Dark metals swing through larger temperature ranges. Allow a tiny expansion gap at long runs, and avoid locking seams that cannot move. Oil canning is cosmetic, but on a straight contemporary fascia line, it will draw the eye.
In coastal areas, salt attacks cut edges first. Deburr cuts, prime exposed steel, or better yet, use aluminum with a marine-grade coating. Stainless screws for gutter brackets are cheap insurance; mixing metals can set up galvanic corrosion if you are careless.
How Drip Edge Interacts With Starter, Underlayment, and Flashings
When I train new installers, I make them lay a sample corner several times. The choreography matters. At eaves, set the drip edge first. Run the ice and water shield over it, tight to the edge, without stretching the membrane. Install the starter strip with the adhesive line just back from the drip edge hem. Then lay your first course of shingles with a modest overhang. At the rake, underlayment first, then drip edge, then starter and field shingles.
Around dormers and roof-to-wall intersections, I prefer to run step flashing over the rake drip edge rather than the other way. Any water that gets behind the siding should step onto the metal and out, not behind the drip edge. At inside corners where two rakes meet a valley, prebend a custom diverter so water running down the valley cannot leap the hem and get behind gutter ends. The small time it takes to craft that diverter beats a callback every day.
Troubleshooting: Signs the Drip Edge Is Failing
From the ground, streaks and stains tell stories. Look for faint black lines along the fascia a foot or two below the roof line, especially near corners. This often means water is getting behind the gutter. If paint blisters at the fascia top edge, water is curling back. In attics, check the first foot of the deck near eaves for darkening or mold bloom. A musty smell near soffit vents can indicate chronic wetting at the edge.
During a rain, watch how water exits the roof. If sheets of water overshoot the gutter, the drip edge may be too short or the gutter set too low. If water hugs the underside of the drip and drips from the fascia face, the hem is too close or the profile lacks a kick.
Cupped shingles at the edge, especially in the first two courses, might not be a shingle defect. Often the deck edge has swelled from intermittent wetting. That’s a red flag for missing or improperly layered drip edge at the eave.
Repairing and Upgrading Without a Full Reroof
You do not always need a complete roof shingle replacement to fix an edge problem. On roofs with plenty of life left, I have surgically replaced drip edge and the first course or two of shingles at the perimeter. It is delicate work, since older shingles can be brittle, but a seasoned crew can lift tabs, remove the starter and first course, cut back felt as needed, and retrofit a proper eave detail with membrane over the new metal. If fascia damage exists, now is the time to replace it and prime all cuts.
When gutters need work, coordinate with the drip edge upgrade. Sometimes just resetting gutters to tuck behind the metal ends a long-running leak. If you are already planning shingle roof repair at valleys or skylights, roll the edge detail into the same visit to save on mobilization costs.
For homeowners asking whether this is a DIY project, I offer a simple test: if you can name the correct layering at eaves and rakes without notes, have the right pry bars, and are comfortable working at height with fall protection, you may be able to handle a small section. Otherwise, hire a shingle roofing contractor. The learning curve on a ladder can be expensive.
Cost, Codes, and the Value Conversation
Material cost for drip edge is modest relative to the entire shingle roof. On a typical single-story home with 200 linear feet of eaves and rakes, upgrading from bargain 0.010 inch aluminum to a heavier, hemmed profile might add a few hundred dollars in material. Labor increases slightly to manage overlaps and clean miters. Against the cost of a soffit rebuild or interior drywall repair, it is a bargain.
Most modern codes now require drip edge at eaves and rakes for asphalt shingles. They also spell out overlap, nailing, and integration with underlayment. Inspectors look for it, but they cannot see layering under shingles once installed. Compliance depends on the crew’s discipline. If you are collecting bids, ask each bidder to describe the edge sequence and metal thickness. You will hear the difference between someone who just sells roofs and someone who builds them.
When to Replace Versus Patch
If you are seeing widespread paint failure along the fascia, gutter backflow during rain, and soft spots at the eaves, a piecemeal approach may not hold. By the time multiple symptoms show, the deck edge can be compromised. In those cases, plan for roof shingle replacement. That gives the crew a clean slate to correct deck geometry, replace damaged sheathing, set a continuous drip edge, and integrate membrane properly.
If the shingles are relatively young and the issue is localized, targeted shingle roof repair can stop the damage. Replace the affected metal, install membrane over the eave edge, and reset the starter and first courses. Take the opportunity to adjust gutter pitch and verify the downspouts handle storm volume. A system view beats a band-aid on one edge.
A Short Field Checklist for Homeowners
Use this during a walk-around or when meeting a contractor. It is not exhaustive, but it catches the big misses.
- At the eaves, is the membrane lapped over the drip edge, with underlayment on top of the membrane and shingles over both? At the rakes, is the underlayment under the drip edge, not over it? Are seams overlapped at least six inches, with neat cuts at corners and a consistent hem projection? Do gutters tuck behind the drip edge, and does water land in the trough during rain? Are nails spaced no more than 8 to 10 inches, tighter at corners, with no nails near the drip lip?
If a contractor cannot answer these points confidently, keep interviewing. The difference shows up after the first storm.
Choosing the Right Shingle Roofing Contractor
A good installer treats the perimeter like the foundation of the roof. Ask to see a recent project before shingles went down. Photos of crisp miters at outside corners, clean overlaps, and straight lines speak volumes. During estimates for roof shingle installation or roof shingle repair, listen for details: metal gauge, profile, and the eave versus rake layering. Generalities often mean shortcuts.
References help, but look at homes that have weathered at least a couple of seasons. Fresh roofs hide sins. Older work tells the truth. A contractor who offers to upgrade your drip edge, integrate with ice and water shield, and correct fascia irregularities is investing in your roof’s longevity. That mindset is worth paying for.
Final Thoughts From the Edge
It is easy to get dazzled by shingle brands, color blends, and warranties. None of that matters if water sneaks under the perimeter. Proper drip edge installation is not glamorous, but it is the difference between a roof that performs for two decades and one that demands constant tinkering. Done right, the edge acts like a small, precise piece of armor. It keeps the deck dry, the fascia intact, the gutters honest, and the shingle field stable. For a homeowner weighing roof shingle replacement or a targeted shingle roof repair, make the edge detail a non-negotiable. Your future self, standing under a dry soffit during a sideways rain, will be grateful.
Express Roofing Supply
Address: 1790 SW 30th Ave, Hallandale Beach, FL 33009
Phone: (954) 477-7703
Website: https://www.expressroofsupply.com/
FAQ About Roof Repair
How much should it cost to repair a roof? Minor repairs (sealant, a few shingles, small flashing fixes) typically run $150–$600, moderate repairs (leaks, larger flashing/vent issues) are often $400–$1,500, and extensive repairs (structural or widespread damage) can be $1,500–$5,000+; actual pricing varies by material, roof pitch, access, and local labor rates.
How much does it roughly cost to fix a roof? As a rough rule of thumb, plan around $3–$12 per square foot for common repairs, with asphalt generally at the lower end and tile/metal at the higher end; expect trip minimums and emergency fees to increase the total.
What is the most common roof repair? Replacing damaged or missing shingles/tiles and fixing flashing around chimneys, skylights, and vents are the most common repairs, since these areas are frequent sources of leaks.
Can you repair a roof without replacing it? Yes—if the damage is localized and the underlying decking and structure are sound, targeted repairs (patching, flashing replacement, shingle swaps) can restore performance without a full replacement.
Can you repair just a section of a roof? Yes—partial repairs or “sectional” reroofs are common for isolated damage; ensure materials match (age, color, profile) and that transitions are properly flashed to avoid future leaks.
Can a handyman do roof repairs? A handyman can handle small, simple fixes, but for leak diagnosis, flashing work, structural issues, or warranty-covered roofs, it’s safer to hire a licensed roofing contractor for proper materials, safety, and documentation.
Does homeowners insurance cover roof repair? Usually only for sudden, accidental damage (e.g., wind, hail, falling tree limbs) and not for wear-and-tear or neglect; coverage specifics, deductibles, and documentation requirements vary by policy—check your insurer before starting work.
What is the best time of year for roof repair? Dry, mild weather is ideal—often late spring through early fall; in warmer climates, schedule repairs for the dry season and avoid periods with heavy rain, high winds, or freezing temperatures for best adhesion and safety.