Roof pitch looks simple on paper, just a ratio of rise to run, yet it dictates almost everything about a shingle roof. I have stood on 3:12 ranches that felt like sidewalks and 12:12 Victorians that demanded a harness and two extra hands. The angle changes how water moves, how wind grabs edges, how installers stage the work, and how long the materials last. If you match shingle type, underlayment, and installation details to the pitch, you get a quiet roof that rides out storms and sheds years gracefully. If you ignore pitch, even premium shingles can fail early.
This guide spells out how roof pitch affects shingle selection, why code and manufacturer specs matter, and where the craft shows up in roof shingle installation, repair, and replacement.
What roof pitch really means in the field
Pitch is normally expressed as a slope per 12 inches of horizontal run. A 4:12 roof rises 4 inches for every foot of run. Most shingle manufacturers group performance by four broad ranges:
- Low slope: 2:12 up to but not including 4:12. Conventional slope: 4:12 to 9:12. Steep slope: 9:12 to 12:12. Very steep and specialty: above 12:12, or curved.
Those categories are practical, not https://alexisnlai909.raidersfanteamshop.com/how-to-compare-quotes-from-shingle-roofing-contractors just shorthand. Water behavior on a 3:12 roof is closer to a flat membrane system than to a 6:12 shingle roof. On a 12:12, wind uplift and shingle alignment become the priority. I have seen more leaks blamed on the shingles where the pitch was the real culprit, either because the underlayment was wrong for the slope or the adhesive never set in cool shade on a steep north face.
Why pitch dictates your shingle choices
Shingle roofs rely on overlapping courses and gravity to move water down and off the deck. As the pitch flattens, water slows and can push uphill under wind or capillary action. As the pitch steepens, the layer count is fine, but mechanical forces increase and little mistakes become big problems. The main consequences:
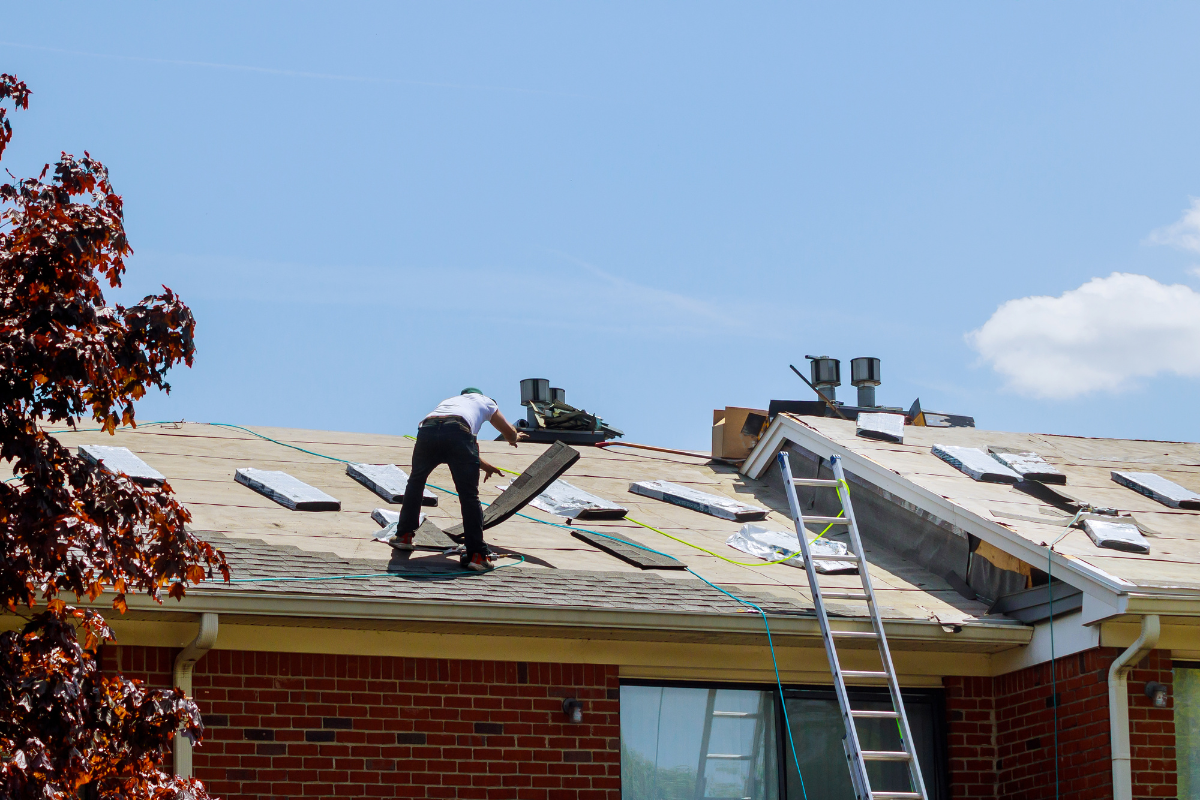
- Water shedding vs water resistance. A 6:12 roof sheds water quickly. A 3:12 roof needs the system to resist water driven sideways or back up under the laps. Adhesive activation. Shingle sealant strips soften and bond under heat and sun. On steep or shaded roofs, bond may take longer to set, which affects wind resistance in the first weeks. On low slope, the adhesive helps but cannot substitute for proper underlayment detailing. Uplift forces. Wind creates negative pressure on exposed shingle edges and rakes. The steeper the pitch, the more the wind “sees” the shingle face. Nail count, placement, and accessory choices matter more. Foot traffic and installation safety. A roof that installers can comfortably walk tends to receive more consistent nailing and straight courses. On very steep slopes, staging is essential, and any missed fasteners or crooked courses are expensive to fix.
Low-slope thresholds and what changes at 2:12 to 4:12
As soon as a roof drops below 4:12, the rulebook changes. Most asphalt shingle manufacturers allow shingles down to 2:12 with enhanced underlayment. Below 2:12, shingles are typically not approved by code or warranty.
At 2:12 to 3:12, treat the roof like a water-resistant system with shingle cladding. That means a self-adhered ice and water membrane from eave to ridge, or at minimum from eaves up beyond interior warm lines, with laps and end joints carefully rolled. Every valley should be closed-cut over continuous membrane or metal. Penetrations get wide flanges and generous membrane boots. In windy zones, I often specify a double underlayment approach: a full-coverage self-adhered membrane and a synthetic cap sheet to facilitate working without tearing the sticky layer.
At 3:12 to 4:12, you can relax slightly but still follow the low-slope rules for underlayment. Drip edge becomes more than a neat finish, it is a water management device. Use starter shingles with a strong adhesive line and push your overhang measurements carefully. A short overhang that flies on a 7:12 will drip behind the gutter on a 3:12.
Material choice matters too. Dimensional shingles tend to have heavier butt ends and stronger sealant, which helps on low pitch. Three-tab shingles can work, but they are more vulnerable to wind-driven rain at the keyways. In cold maritime climates, I have replaced more three-tabs on low slopes than any other configuration.
Conventional slopes from 4:12 to 9:12, the sweet spot
Most neighborhoods fall here. Water moves well, installers can work efficiently, and the catalog is wide open. Architectural shingles dominate because they look good and hide minor deck imperfections. In this range, you can focus on aesthetics, brand-specific features, and the local climate.
That said, pitch still pushes decisions if you look closely. On the low end, 4:12 in a heavy rain region benefits from wider valleys, either open metal with hemmed edges or woven architectural shingles if the manufacturer allows it. On the high end, 8:12 to 9:12 demands straighter lines and more attention to nail placement because any waviness reads from the street.
In this band, the underlayment usually shifts to synthetic felts with ice barrier at eaves according to code. I prefer a high-traction synthetic on anything above 6:12, it is safer underfoot, and it resists wrinkling that can telegraph through shingles in heat.
Steep slopes, from 9:12 to 12:12, where wind and craft dominate
Steep roofs are gorgeous, they shed water and snow in a hurry, and they advertise any sloppy work. The sealant must activate quickly, nails must land in the exact zone, and exposure lines need to stay true.
On steep pitches, shingle selection tends to favor heavier laminated products, designer profiles, or even small-format shingles that conform better at ridges and dormer returns. Heavier shingles resist uplift and lay flatter over accents. Some brands publish specific high-wind nailing patterns, often six nails per shingle with cap nails for underlayment on slopes above a threshold. Use those patterns, and if the home sits on a ridge where gusts are routine, consider starter strips with two adhesive lines for the rakes.
Accessories make or break a steep roof. Ridge ventilation must balance intake so that snow swirl does not drive powder under the cap. Wide ridge caps or factory-formed caps hold better lines than cut 3-tabs on steep peaks. Metal flashing at sidewalls deserves backing cleats and counterflashing that truly laps, not just caulked faces that will peel within a season.
Very steep and specialty roofs above 12:12
Once a roof climbs beyond 12:12, safety and fastening come first, and the design should consider whether asphalt shingles are the right cladding. They can perform well if the deck is solid, the climate cooperates, and the detailing is precise, but options like standing seam metal or small-slate patterns may fit better in snow or high-wind corridors.
If shingles are chosen, expect a few realities. Staging slows production, so roof shingle replacement costs rise. You may need to hand-seal shingles in cool weather or shaded faces to ensure early wind resistance. The exposed faces weather more evenly because they see sun at stronger angles, a cosmetic benefit that owners appreciate.
Code and manufacturer rules you cannot ignore
Building codes set the floor, manufacturers set the ceiling. The warranty lives or dies on pitch, underlayment type, and nailing pattern. A few typical rules you will see in many spec sheets:
- Below 4:12, use special low-slope underlayment detailing, often full-coverage self-adhered membrane. Minimum pitch for shingles is commonly 2:12 with those extra steps. Below 2:12, use a membrane or metal roof. Nail count and placement may change by pitch, wind zone, and product line. Six nails per shingle is common in high-wind areas or on steeper slopes. Closed-cut valleys are widely accepted on conventional pitches, while open metal valleys with hemmed edges are safer in low-slope or heavy debris areas.
Inspectors in many jurisdictions will glance at the house from the curb and ask to see underlayment at eaves. They know the short list of pitch-triggered details. A conscientious shingle roofing contractor documents the slope and product choices in the proposal for this reason.
Underlayment strategy by pitch
On a 2:12 or 3:12 roof, I want a belt and suspenders approach. Ice and water shield from the eave to at least 24 inches inside the warm wall, which usually translates to 36 inches or more up the slope depending on overhang. If the roof is low enough to warrant full coverage with self-adhered membrane, that is my default. Over that, a synthetic underlayment can be run to improve walkability and to avoid sticking shingles directly to the membrane in hot weather, which complicates future shingle roof repair.
At 4:12 to 6:12, a high-quality synthetic underlayment with ice barrier at eaves and valleys is the norm. Make sure the laps follow the printed lines and the cap nails sit flush. Staples telegraph through many synthetics and lose grip if the deck dries and shrinks.
On steep slopes, cap nail density matters. Wind gets under big sheets of underlayment. If the manufacturer calls for closer nail spacing above 9:12, follow it. Nothing tanks morale like finding sail-shaped underlayment flapping after a night wind and knowing the crew will re-roll an entire face before shingles go on.
Shingle profile, weight, and exposure relative to pitch
There is no universal winner across all pitches, but a few patterns have held up across hundreds of roofs:
- Laminated architectural shingles suit a wide band of slopes. The staggered butt edges hide slight waviness, and their mass helps on windward faces. They also allow fatter shadow lines that read well from the ground. Three-tab shingles can look crisp on lower-cost projects and on simple rooflines, and they have fewer voids for wind-driven rain if you offset seams carefully. They are, however, thinner and more sensitive to nail placement at the sealant line on steep pitches. Designer cut shingles with varied tabs are best on 6:12 and above where their pattern reads. On 3:12, their articulation is lost, and the price premium is harder to justify. Narrow exposure shingles are useful on curves and very steep slopes because each course follows the deck more obediently.
Pay attention to the printed exposure lines and whether the product offers a steep-slope accessory set. Some lines include stiffer ridge caps that resist buckling on tight peaks.
Fasteners, adhesives, and the physics of pitch
Nail length, shank type, and corrosion resistance need to match the deck and climate. I prefer ring-shank hot-dipped galvanized nails into solid 7/16 OSB or 1/2 inch plywood, with adjustments if the deck is plank. On steep slopes, rings hold especially well because gravity is trying to slide courses. Keep nails in the common bond area. Low nails leak, high nails lose shingles to wind. These truths show up in every manufacturer’s diagram, yet most of the leaks I have fixed share one cause: nails not where they belong.
Sealant strips do heavy lifting at edges and laps. On hot summer installs, shingles bond fast. On crisp spring or fall days, particularly on shaded faces, I often add a nickel-sized dab of compatible roofing cement under corners and at cut lines, especially on steeper pitches or at rakes where uplift starts. Do not smear adhesive across the face, it traps moisture. Dab and press.
Ventilation and pitch, a quiet effect with big consequences
A roof that breathes well lasts. Pitch changes how air moves under the deck. Steeper roofs can draft better, but they also create long attic peaks that need continuous intake to match the ridge. A 9:12 cathedral section with stingy soffit vents bakes shingles in summer and drives winter condensation. On low slopes with wide soffits, intake is easy, but the short ridge limits exhaust unless you use off-ridge vents or smart baffles.
This matters for all shingles, but especially for darker colors on steep south faces. A shingle roof that runs 10 to 20 degrees cooler in summer because of balanced ventilation simply lives longer. It also keeps the adhesive pliable longer, which helps in shoulder seasons.
Working safely and cleanly across pitches
Owners sometimes ask why estimates jump when the pitch increases. A 12:12 roof is not twice as hard as a 6:12, it is a different job. Staging, harnesses, toe boards, material lifts, and slower movements are built into the plan. That extra time shows up in a better finish too. Crews can set straight lines, check reveals every few courses, and tweak flashing pieces until they seat perfectly.
On low slopes, safety looks different. It is about protecting the membrane during roof shingle installation. Avoid kneeling on hot self-adhered layers, which can scuff and later telegraph through shingles. Use roof jacks sparingly and patch any punctures in the underlayment before covering.
Valleys and intersections, where pitch differences collide
Complex roofs often mix pitches. A steep main gable can dump into a low-slope porch. That valley is where design has to match reality. I favor open metal valleys with hemmed edges and end dams at the bottom when pitches differ by more than a couple points. Woven valleys look tidy on a uniform 6:12 roof, but they hold debris where a steep face meets a shallow one. In snow country, kick-outs and diverters matter too. If a 12:12 face sends snow down onto a 3:12 dormer cheek, a slight diverter can save that cheek from annual bruising.
Sidewall step flashing should always be individual pieces, not long continuous L metals, and the counterflashing should return into the siding or masonry, not ride the surface. This stops capillary creep on low slopes and prevents water from chasing behind shingles on steeper faces.
Common mistakes tied to pitch, and how to avoid them
- Installing standard underlayment on 3:12 roofs. It may pass on a bluebird day, then leak in the first nor’easter. Use the low-slope specification from the start. Underestimating wind on steep slopes. If the site is exposed, choose a wind-rated shingle and follow the six-nail pattern with specific rake starters. Tightening valleys as the pitch rises. Open them instead. More water speed wants more metal, not less. Skipping hand-sealing in cool weather on steep north faces. The sealant will eventually set, but a midnight gust in week one can lift tabs. Misjudging aesthetics from the ground. A bold-cut designer shingle can look busy on shallow pitches where the pattern compresses. Mock up a few courses and step back to the street.
How pitch changes repair strategy
Roof shingle repair is as much about access as it is about matching material. On low slopes, repairs are frequently about flashing, not shingles. If a 3:12 roof leaks at a vent, I look at the underlayment laps first, then at the boot. A clean membrane patch under a new boot can cure chronic headaches.
On steep slopes, repairs are usually wind or nail related. A lifted rake line often betrays under-driven nails or a rake without a true starter. Re-seal and renail with the correct fastener pattern, and add a compatible cement dab under the shingle corners. For brittle older shingles on steep faces, warm the work gently, not with a torch, just enough sun or a heat gun at a distance, so you can lift tabs without shattering them.
Matching color is harder on steep, sun-blasted slopes. Shingles fade, and new patches will show. In these cases, a homeowner may be better served by a partial plane replacement if the affected area is large and visible.
How pitch influences roof shingle replacement costs and timelines
Expect the bid to track with pitch. Low-slope shingle roofs take more membrane and detailing time. Very steep slopes require staging and extra labor. In the middle bands, roofs move faster. Material waste goes up slightly with steeper slopes because of additional cuts at hips and valleys. Disposal also climbs because many steep roofs are older with multiple layers, and local code might require complete tear-offs for weight or fire resistance.
Scheduling matters. I prefer to replace steep north faces in warmer months when sealants bond quickly. For low-slope work, cool days reduce foot traffic scuffs on self-adhered membranes. A good shingle roofing contractor will sequence the planes with weather in mind, not just the crew’s convenience.
Choosing a contractor with pitch in mind
Ask pointed questions. What underlayment will you use on my 3:12 porch roof, and can you show me the manufacturer’s low-slope detail? How many nails per shingle on the 10:12 main, and where exactly do they go? Will you use open metal valleys between the 9:12 and the 4:12 tie-in, and what gauge? How will you stage the steep face to protect my landscaping?
A contractor who speaks comfortably about pitch-specific details will deliver a longer-lasting roof. They will also leave a record that supports warranty claims if ever needed.
Regional nuances tied to pitch
Snow country prefers steeper pitches because snow slides, reducing live loads. That does not mean low-slope shingle roofs cannot work, but they demand heat-loss control in the attic to avoid ice dams. Ice barriers at eaves are non-negotiable, and ventilation must be generous.
In hurricane and high-wind regions, moderate pitches paired with high-wind rated shingles and tight nailing patterns perform very well. Avoid tall gable overhangs without bracing, they become levers. On very steep homes near coastal winds, metal edge details and hand-sealed courses during cooler seasons reduce early uplift risk.
In arid, sun-intense climates, steep pitches cast their own shade line by line, which can slow UV degradation. Lighter colors help on any pitch, dropping deck temperatures. On low slopes, consider cool-rated shingle options where available, but still follow the low-slope underlayment rules.
A short homeowner checklist before you decide
- Confirm the exact pitch of each roof plane. Mixed pitches need mixed details. Ask for the manufacturer’s installation pages that apply to your pitch and climate. Verify underlayment type and coverage, especially on anything under 4:12. Clarify nail count and pattern for your wind zone and slope. Review valley, rake, and eave edge details with drawings or samples.
A note on aesthetics across pitches
The same shingle looks different at 3:12 than at 9:12. On low slopes, texture and shadow flatten. Colors read more as fields than as patterns, so choose hues for overall tone, not for intricate cut lines. On steep slopes, the pattern pops. If your home has tall gables, you can justify upgraded designer cuts because you will see the extra depth. Ridge cap selection matters too, especially on steep ridges where thin caps telegraph every deck seam.
Final thoughts from the roofline
Pitch is the quiet spec that governs almost every other decision in shingle roofing. It tells you how to build the underlayment, which shingle lines will behave, how many nails to drive, and when to add a dab of adhesive that saves a rake line in a spring gust. It even affects color and curb appeal. Whether you are planning roof shingle installation on a new build, weighing the scope of roof shingle repair after a storm, or budgeting for a full roof shingle replacement, start by measuring the slope carefully. Then choose the system, not just the shingle, that fits that angle. If your shingle roofing contractor speaks fluently about the details in this article, you are on the right path to a roof that performs as good as it looks, at any pitch.
Express Roofing Supply
Address: 1790 SW 30th Ave, Hallandale Beach, FL 33009
Phone: (954) 477-7703
Website: https://www.expressroofsupply.com/
FAQ About Roof Repair
How much should it cost to repair a roof? Minor repairs (sealant, a few shingles, small flashing fixes) typically run $150–$600, moderate repairs (leaks, larger flashing/vent issues) are often $400–$1,500, and extensive repairs (structural or widespread damage) can be $1,500–$5,000+; actual pricing varies by material, roof pitch, access, and local labor rates.
How much does it roughly cost to fix a roof? As a rough rule of thumb, plan around $3–$12 per square foot for common repairs, with asphalt generally at the lower end and tile/metal at the higher end; expect trip minimums and emergency fees to increase the total.
What is the most common roof repair? Replacing damaged or missing shingles/tiles and fixing flashing around chimneys, skylights, and vents are the most common repairs, since these areas are frequent sources of leaks.
Can you repair a roof without replacing it? Yes—if the damage is localized and the underlying decking and structure are sound, targeted repairs (patching, flashing replacement, shingle swaps) can restore performance without a full replacement.
Can you repair just a section of a roof? Yes—partial repairs or “sectional” reroofs are common for isolated damage; ensure materials match (age, color, profile) and that transitions are properly flashed to avoid future leaks.
Can a handyman do roof repairs? A handyman can handle small, simple fixes, but for leak diagnosis, flashing work, structural issues, or warranty-covered roofs, it’s safer to hire a licensed roofing contractor for proper materials, safety, and documentation.
Does homeowners insurance cover roof repair? Usually only for sudden, accidental damage (e.g., wind, hail, falling tree limbs) and not for wear-and-tear or neglect; coverage specifics, deductibles, and documentation requirements vary by policy—check your insurer before starting work.
What is the best time of year for roof repair? Dry, mild weather is ideal—often late spring through early fall; in warmer climates, schedule repairs for the dry season and avoid periods with heavy rain, high winds, or freezing temperatures for best adhesion and safety.